
Schedule Imports in Accentuate Custom Fields
The Scheduled Import feature in Accentuate Custom Fields (ACF) allows you to upload a file containing custom field values and schedule when those values should be imported into your store.
Instead of applying changes immediately, you can choose a specific date and time when the import should run automatically.
This makes it easier to prepare updates in advance and ensure custom field values are activated exactly when you need them.
When to Use This Feature
Section titled “When to Use This Feature”Scheduling imports is useful in situations where data updates should happen at a specific time, such as:
- Preparing product data before a product launch
- Updating custom fields for campaigns or seasonal changes
- Scheduling updates during low traffic hours
- Planning content changes in advance
- Coordinating updates across multiple stores or teams
With scheduled imports, you can prepare your data ahead of time and let ACF apply the changes automatically.
How It Works
Section titled “How It Works”When creating an import in Accentuate Custom Fields, you can choose to schedule the import instead of running it immediately.
Once scheduled:
- The import job is saved in the Activity Log.
- The job remains in Scheduled status until the selected time.
- At the scheduled time, ACF automatically processes the file and applies the custom field updates.
- You can edit or cancel the scheduled job before it runs.
How to Schedule an Import
Section titled “How to Schedule an Import”Follow these steps to schedule an import of custom field values.
1. Open the ACF Dashboard
Section titled “1. Open the ACF Dashboard”Go to Accentuate Custom Fields → Dashboard.
2. Select the Scope
Section titled “2. Select the Scope”Choose the object type you want to import values for, such as:
- Products
- Variants
- Collections
- Customers
- Shops
3. Open the Import Option
Section titled “3. Open the Import Option”Click the three-dot menu next to the selected scope and choose: Import
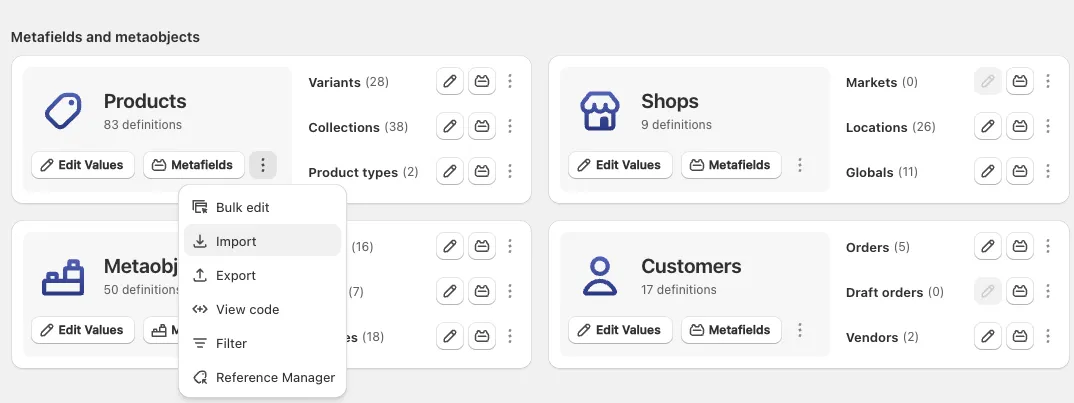
4. Prepare Your Import File
Section titled “4. Prepare Your Import File”Prepare your import file using the ACF export format (XLSX). This ensures the importer can correctly match objects and custom fields.
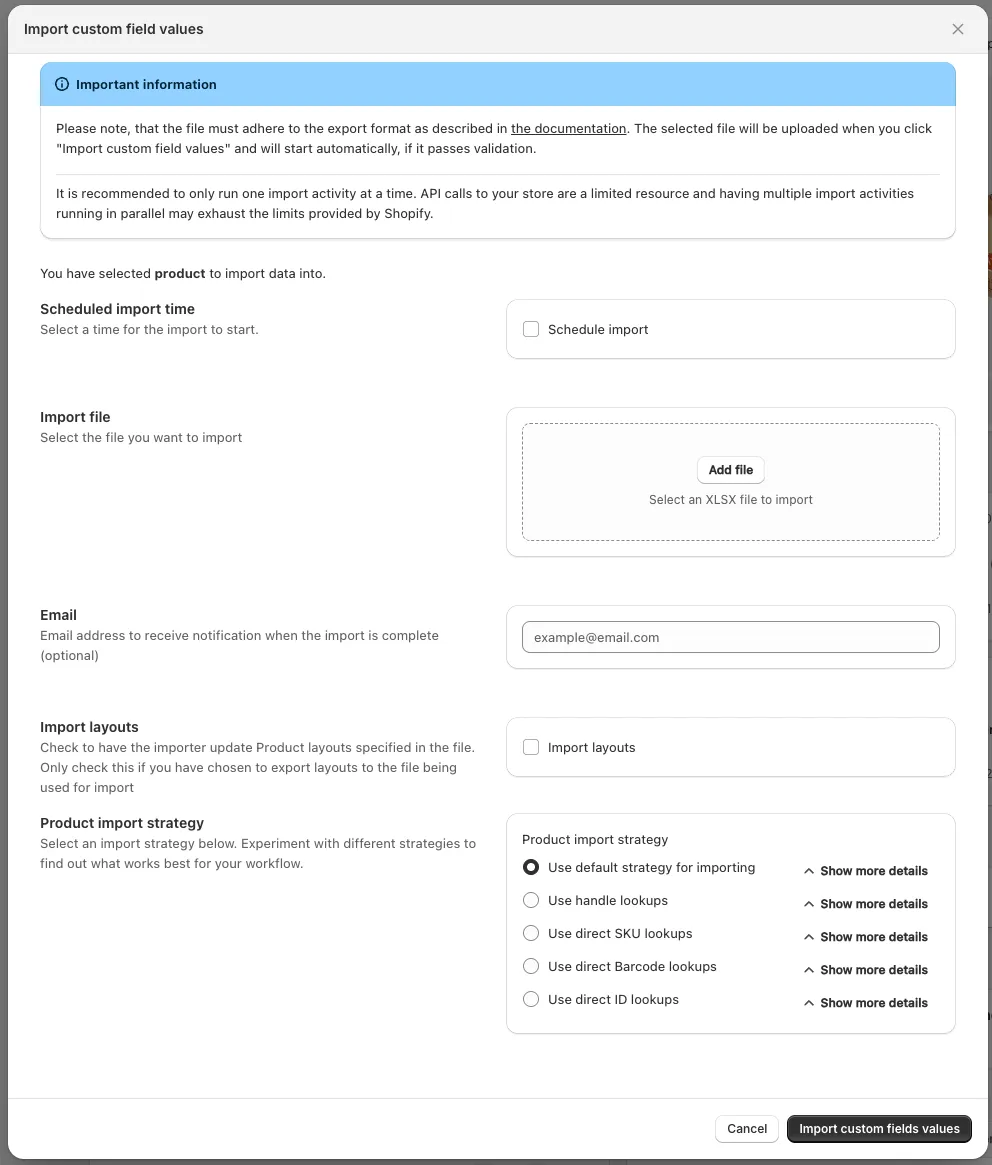
5. Upload the File
Section titled “5. Upload the File”In the Import custom field values modal:
- Click Add file
- Upload your XLSX file
6. Enable Scheduling
Section titled “6. Enable Scheduling”Check the Schedule import option.
7. Select Date and Time
Section titled “7. Select Date and Time”Choose:
- the date
- the hour
- the minutes
- AM / PM
The import will run automatically at the selected time based on your store’s local time.
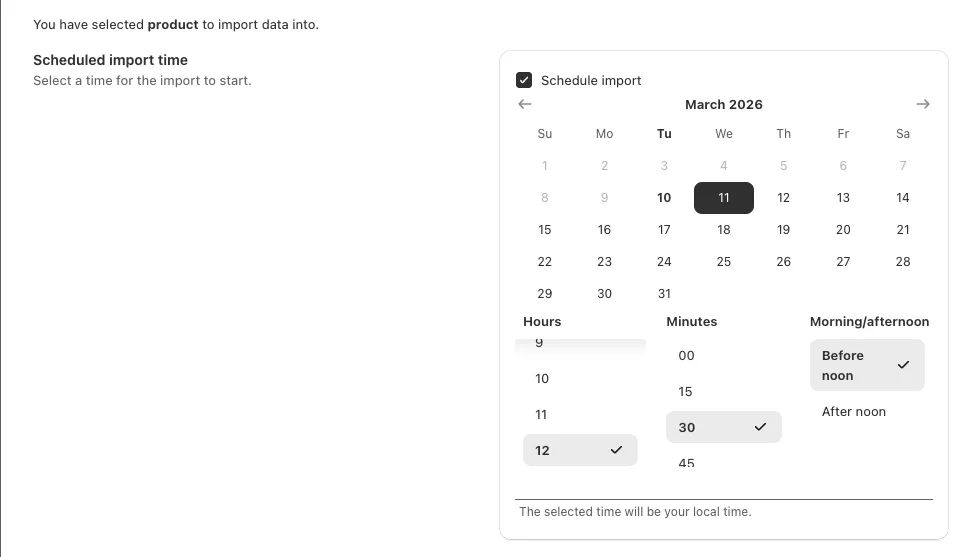
8. Start the Scheduled Import
Section titled “8. Start the Scheduled Import”Click Schedule import to create the job.
The import will now appear in the Activity Log.
How to Edit or Cancel a Scheduled Import
Section titled “How to Edit or Cancel a Scheduled Import”If you need to change or cancel a scheduled import, you can manage it from the Activity Log.
1. Open Activity Log
Section titled “1. Open Activity Log”Go to: Accentuate Custom Fields → Activity Log

2. Find the Scheduled Job
Section titled “2. Find the Scheduled Job”Locate the import with the status Scheduled.
3. Open the Options Menu
Section titled “3. Open the Options Menu”Click the three-dot menu next to the job.
You will see options such as:
- Edit – change the scheduled date and time
- Cancel – cancel the scheduled import

4. Update the Schedule
Section titled “4. Update the Schedule”If editing:
- Select a new date and time
- Click Update Schedule
Example
Section titled “Example”A merchant is preparing a new product launch scheduled for Friday at 10:00 AM. Instead of manually updating product custom fields at launch time, they:
- Export the current product custom fields
- Update the values in the file
- Upload the updated file in ACF
- Schedule the import for Friday at 10:00 AM
When the launch begins, ACF automatically applies the new custom field values.
Notes / Limitations
Section titled “Notes / Limitations”- Scheduled imports run based on the store’s local time.
- Scheduled jobs appear in the Activity Log until they are completed or cancelled.
Tips / Best Practices
Section titled “Tips / Best Practices”- Test imports on a small dataset first to confirm the file format.
- Schedule large imports during low traffic hours.
- Use exports as templates when preparing import files.
- Check the Activity Log after scheduled imports to confirm completion.