
How to show fields in your storefront
Showing your custom fields
Section titled “Showing your custom fields”Once a custom field has a value, there are three ways to get it showing on your storefront:
- Dynamic Sources - connect a field to a compatible block setting from the theme editor, no code involved.
- ACF theme blocks - add one of ACF’s ready-made blocks from the theme editor and customize its appearance, no code involved.
- Editing your theme’s code - place the field exactly where you want in your theme’s Liquid, for full control over the markup.
Which one fits depends on how much control you need and how comfortable you (or your developer) are with Liquid - the two no-code routes cover most everyday cases, and editing the theme is there for anything they can’t reach.
Connecting fields with Dynamic Sources
Section titled “Connecting fields with Dynamic Sources”Shopify’s Dynamic Sources let you connect a block’s setting directly to a metafield from the theme editor - no code required. Open Online Store → Themes → Customize, select a block that supports dynamic sources (for example a text or image block), and choose your metafield from its settings panel instead of typing or uploading content manually.
Adding an ACF theme block
Section titled “Adding an ACF theme block”ACF also ships its own set of premade custom theme blocks - ready-to-use content blocks you add straight from the theme editor. Go to Online Store → Themes → Customize, then Add block / section → Apps, and pick one of the ACF-provided blocks. Once it’s on the page, customize its appearance from the same settings panel and you’re good to go - no theme code involved.
Editing your theme’s code
Section titled “Editing your theme’s code”For anything Dynamic Sources or ACF’s theme blocks can’t reach, you can edit your Shopify theme directly. Your theme determines where and how various Shopify bits and pieces go on which pages. “Bits and pieces” also include your new custom fields a.k.a. Metafields.
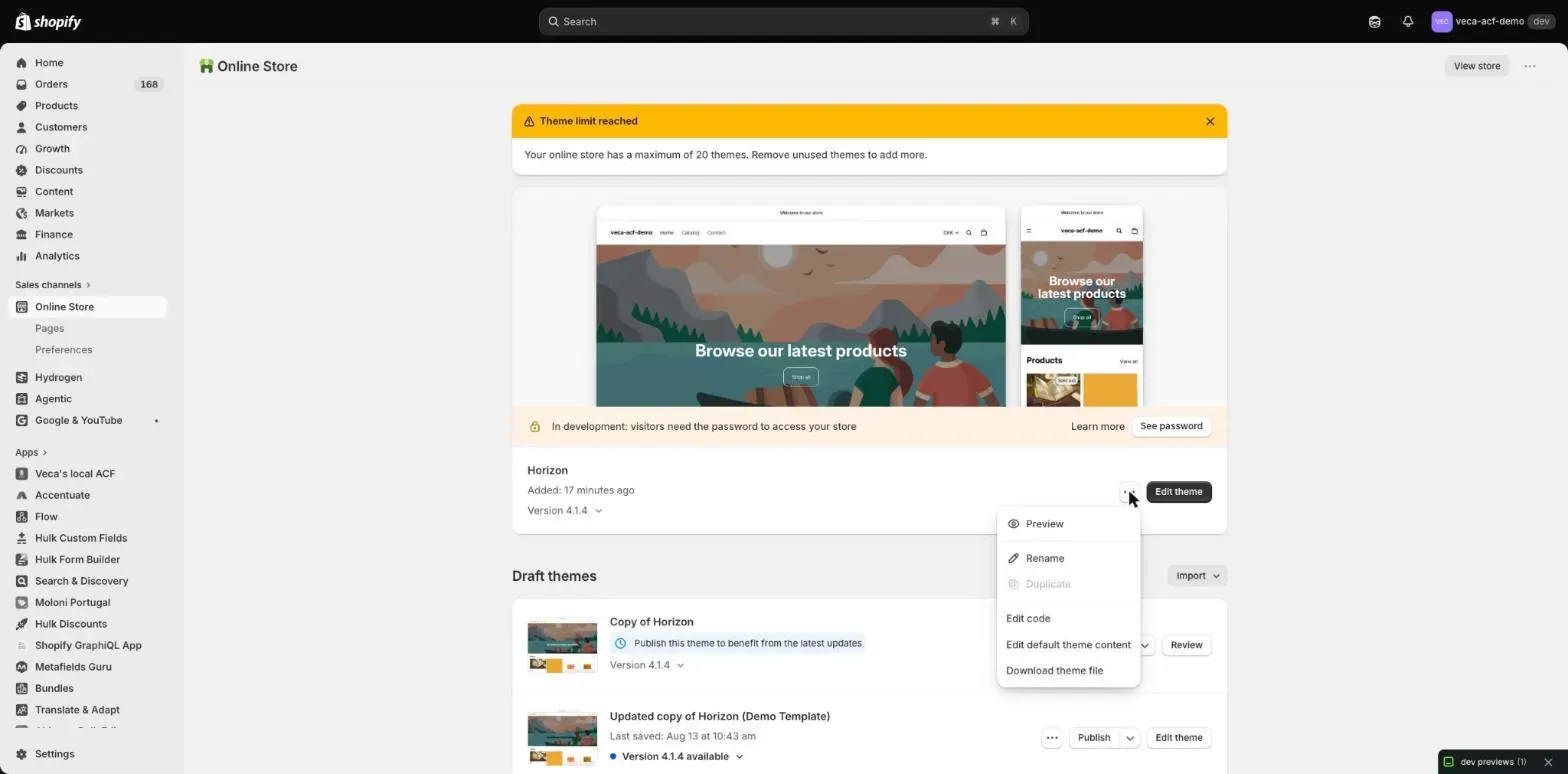
There are several ways to edit a theme, but the most straightforward way is to use the built-in code editor in your Shopify admin. From Online Store, open the ⋯ menu on the theme you want to edit and choose Edit code:
As you know, you can choose from a wide range of themes from the Shopify Theme Store and also have a given theme customized to your specific needs. Or you can have a theme completely custom-built for your store.
As a result, every theme structure is different and every one of our customers’ field setups and needs are different.
In this help center, we provide you with small general snippets of code as examples of how to use Shopify Metafields in different contexts and leave the actual implementation details (theme changes) up to you as the store owner and/or your developers. Please see Shopify’s Editing theme code article on the subject.
Too specific and detailed instructions for which theme files you should edit in your theme could potentially be misleading, but we’ll give a simple example here anyway. Just note that your theme’s list of files and the contents of those will almost certainly be different from our examples, but the overall principle is the same.
A quick word on theme structure
Section titled “A quick word on theme structure”Modern (“Online Store 2.0”) themes no longer keep a page’s markup in a single file like the old product.liquid. Instead, the code editor’s file list is organized into a handful of top-level folders:
- templates - one JSON file per page type (e.g.
product.json), listing which sections appear on that page and in what order. - sections and blocks - the actual building blocks a template is made of. Many pieces you’d expect to find inline - like the product description - are now their own small
.liquidfile underblocks, each with its own{% schema %}controlling what a merchant can configure for it in the theme editor. - snippets, assets, layout, config, locales - reusable partials, CSS/JS/images, the theme’s outer HTML shell, settings and translations, much as before.
Because of this, the fastest way to find where a particular piece of content is rendered is to use the code editor’s built-in search (the magnifying glass icon in the left-hand rail, or Cmd/Ctrl+Shift+F) rather than clicking through files one by one. Searching for text you can see on the storefront - or for a Liquid object you’d expect to be involved, such as product.description - will usually take you straight to the right block or section.
Example
Section titled “Example”In this example, we have created a “Washing Instructions” HTML type field for products called accentuate.washing_instructions (namespace-dot-name syntax) and we want to display it alongside the product’s add-to-cart button.
After searching the theme for where that part of the page is rendered, we land on blocks/buy-buttons.liquid - the theme block responsible for the add-to-cart form:
{% content_for 'block', type: 'add-to-cart', id: 'add-to-cart', can_add_to_cart: can_add_to_cart, add_to_cart_text: add_to_cart_text%}We don’t touch how the add-to-cart button itself is rendered, but add our field’s markup right after it, taking care to only show it when there’s actually something to display:
{% comment %} ACF Edit Example {% endcomment %}{% if product.metafields.accentuate.washing_instructions %} <div> {{ product.metafields.accentuate.washing_instructions }} </div>{% endif %}Save your changes and that’s it! Your products now show washing instructions where these are available.
Metafields aren’t just for the storefront
Section titled “Metafields aren’t just for the storefront”Showing values on the storefront is only one use for your custom fields. Because they’re plain Shopify metafields under the hood, they’re just as usable outside your theme - for example driving Flow automations, syncing data with third-party apps and integrations, or being read and written through ACF’s own API.